

Proper Mixing Techniques for Resin
- Nov 6, 2023
- 8 min read
Resin, when mixed properly, can transform into a versatile material that can be molded into almost anything - from intricate jewelry pieces to stunning home decor items, and even preserving precious memories like wedding bouquets.

As experts in resin mixing, Bouquet Casting Co has perfected their technique through years of experience, resulting in high-quality preserved bouquets and resin art products. Their meticulous attention to detail and commitment to quality have earned them the reputation of being one of the best in the business.
By sharing the knowledge they've gathered over the years, they hope to inspire and guide others in the exciting journey of resin art and crafts.
Understanding Resin and Its Importance in Art and Crafts

Resin, in the context of art and crafts, is a two-part system that comprises a resin (Part A) and a hardener (Part B). When these two components are mixed together, they undergo a chemical reaction to form a solid material that is durable, resistant, and versatile.
This material can be shaped, molded, and even colored, making it a popular choice for a wide range of art and craft projects.
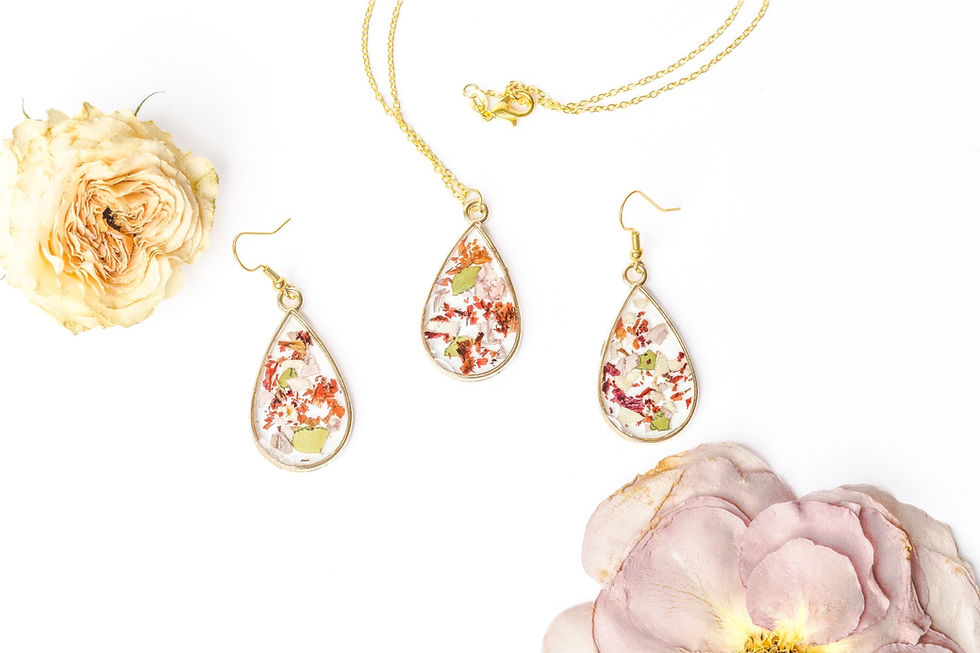
The possibilities are truly endless, from creating stunning epoxy resin jewelry to designing unique home decor items, and even preserving precious memories like wedding bouquets.
Proper resin mixing is a critical factor in the success of epoxy art and craft creations. It ensures that the resin and hardener are evenly combined, resulting in a material that is strong and uniform. For instance, when creating resin jewelry, thorough mixing ensures that the resin cures evenly, resulting in a final product with a smooth, glossy finish.
In resin painting, proper mixing allows the colors to blend seamlessly, creating a final piece of art that is vibrant and visually captivating. By mastering the art of resin mixing, you can significantly enhance the quality of your resin creations and avoid common issues such as incomplete curing or uneven surfaces.
Necessary Tools for Resin Mixing
Mixing resin properly requires the right tools. A metallic mixing spatula or stirrer is ideal for mixing resin and hardener thoroughly. The sturdy and smooth surface of a metallic spatula allows for efficient mixing, ensuring that there are no unmixed pockets of resin or hardener. This is crucial for achieving a uniform mixture that will cure evenly and result in a strong, durable final product.
Measuring cups are essential for accurately measuring the amounts of resin and hardener required. Different brands and types of resins have different recommended mixing ratios, so accurate measurement is crucial for achieving optimal results. For larger quantities of resin, mixing machines or drill-mounted mixing paddles can be a more efficient option. These tools can mix large amounts of resin quickly and evenly, saving you time and effort.

Lastly, it is vital to ensure that your tools are clean and dry before use. Any dirt, moisture, or residue from previous mixes can interfere with the curing process and compromise the quality of your final product.
Take, for instance, the Bouquet Casting Co. They use high-quality metallic mixing spatulas and precise measuring cups to ensure accurate and thorough resin mixing. They understand that the success of their preserved bouquets and resin art products largely depends on the quality of their resin mix, so they invest in the best tools and follow the best practices to achieve the desired results.
Safety Measures during Resin Mixing
Working with resin can be a fun and rewarding experience, but it also comes with certain safety considerations. Resin and hardener contain chemicals that can emit fumes during the mixing process, which can be harmful when inhaled. Therefore, it is essential to work in a well-ventilated area and wear a respirator with proper filtration to minimize exposure to these fumes.
Additionally, gloves should be worn to protect your skin from direct contact with the resin and hardener. These chemicals can cause irritation or allergic reactions in some people, so it's always better to err on the side of caution and protect your skin. It's also a good idea to wear old clothes or an apron to protect your clothing from any accidental spills or splashes.
At Bouquet Casting Co., safety is a top priority. They understand the potential risks associated with working with resin and take all necessary precautions to ensure a safe working environment.
This includes providing their staff with the appropriate safety equipment, using materials that meet industry safety standards, and maintaining a well-ventilated workspace. By prioritizing safety, they create a pleasant and secure environment for their staff and customers.

The Resin Mixing Process
The resin mixing process is a systematic procedure that, when followed correctly, can yield optimal results. Start by accurately measuring the resin and hardener as per the recommended ratios.
These ratios may vary depending on the specific brand and type of resin being used, so it's crucial to consult the manufacturer's instructions. Once you have measured the resin and hardener, pour them into a mixing container.
Next, mix the resin and hardener thoroughly for the recommended duration. For instance, Bouquet Casting Co recommends mixing equal parts of resin and hardener in a measuring cup and stirring for 2 minutes. This ensures that the resin and hardener are well-mixed and ready for the next step.
Once the resin and hardener are well-mixed, you can pour the mixture into a mold. Be sure to pour the mixture carefully and slowly to ensure it reaches all corners of the mold and to minimize the formation of bubbles.
If you're working on a complex or intricate design, it may be necessary to mix smaller batches of resin. This allows for more precise control over the pouring process and ensures that the resin is distributed evenly across the mold.
Resin Mixing Ratios
Understanding resin mixing ratios is critical for achieving optimal results in resin art and crafts. These ratios determine the proportions of resin and hardener needed to ensure a successful curing process and a durable final product. The recommended ratios are usually provided by the manufacturer and can vary depending on the specific type of resin being used.
The most common method of measuring resin is by volume. This involves measuring the resin and hardener in equal parts or in a 2:1 ratio, depending on the manufacturer's instructions. However, measuring by weight is a more accurate method, as it takes into account the varying densities of different resins and hardeners.
Consider Bouquet Casting Co's approach. They adhere to specific resin mixing ratios for their bouquet preservation process, ensuring the longevity and beauty of their preserved bouquets. They understand that the success of their preservation process largely depends on the quality of their resin mix, so they take great care in measuring the resin and hardener accurately to achieve the desired results.

Techniques for Thorough Resin Mixing
Achieving a thorough mix is crucial for the durability and strength of the final product. Techniques such as scraping the sides and bottom of the mixing container can help ensure that all components are well-incorporated.
When resin and hardener are mixed, some of it can cling to the sides and bottom of the container. If left unattended, these unmixed pockets can lead to issues such as incomplete or uneven curing. By using a spatula or stirrer to scrape the sides and bottom, you can ensure that all the resin and hardener are thoroughly combined.
Another technique that can assist in thorough mixing is using a clear mixing container. Being able to see through the container allows you to visually inspect the mixture, ensuring that all the components are evenly distributed.
This is particularly important when working with colored resin or when adding inclusions like glitter or flakes.
The use of a drill-mounted mixing paddle can also be beneficial, especially when dealing with larger quantities of resin. This method involves attaching a mixing paddle to a drill and using it to mix the resin and hardener. The rotation of the paddle ensures a more uniform and thorough mixing, eliminating any chances of unmixed pockets. However, care should be taken to avoid whipping too much air into the mixture, as this can introduce unwanted bubbles.

Bouquet Casting Co's expertise in resin mixing techniques ensures their preserved bouquets and resin art products are of the highest quality. They have honed their techniques through years of experience, resulting in consistently high-quality mixes that lead to stunning final products.
Common Resin Mixing Mistakes and How to Avoid Them
Even with the best of intentions, mistakes can happen when mixing resin. Some common mistakes include incomplete curing, uneven curing, discoloration, and bubbles in the final product. These issues can be frustrating and can affect the overall quality and appearance of the final product. However, with a little knowledge and the right techniques, these mistakes can be easily avoided.
Incomplete curing is often a result of not following the manufacturer's instructions for the curing process. Different resins have different curing times and conditions, so it's crucial to adhere to the recommended guidelines. Skipping or rushing the curing process can lead to resin that remains tacky or soft, which can ruin your final product.
Uneven curing can result from not mixing the resin and hardener thoroughly. It's important to take the time to scrape the sides and bottom of the mixing container to ensure that all the components are well-incorporated. This helps to prevent any unmixed pockets that can lead to uneven curing.
Discoloration can occur when the resin and hardener are mixed too vigorously or for too long. This can introduce air bubbles into the mixture, which can cause the resin to become cloudy or develop a yellowish hue. To avoid this, it's best to mix the resin and hardener gently and avoid overmixing.
Bubbles are a common issue in resin mixing, but they can be easily managed. To minimize the presence of bubbles, it's important to mix the resin and hardener slowly and gently. If bubbles do appear, they can be removed by gently blowing on them with a heat gun or using a toothpick to pop them.

At Bouquet Casting Co, they pay meticulous attention to resin mixing, ensuring that these common mistakes are avoided.
Their commitment to quality and attention to detail is evident in their flawless preserved bouquets and resin art products.
Adding Inclusions to Resin
Adding inclusions to your resin mix can take your creation to the next level. Inclusions such as glitter, flakes, or dried flowers can enhance the aesthetic appeal of your resin creations. To add inclusions, simply sprinkle them into the resin mixture during the mixing process and stir gently to distribute them evenly.
The inclusions become suspended in the resin, creating a beautiful effect when the resin cures.
Bouquet Casting Co uses this technique to add a unique touch to their preserved bouquets. By carefully selecting and adding inclusions that complement the flowers, they create unique and captivating preserved bouquets that truly capture the essence and beauty of the original arrangement.
So, whether you're looking to add a touch of sparkle to your resin jewelry or wanting to incorporate dried flowers into a resin painting, adding inclusions can give your creations a unique and personalized touch.
Curing and Removing Resin from Mold
Once the resin has been mixed and poured into the mold, the curing process begins. Curing is the process where the liquid resin transforms into a solid state. This is achieved through a chemical reaction that takes place when the resin and hardener are combined. The curing process usually takes between 24 to 48 hours, but it can vary depending on the specific brand and type of resin being used.
During the curing process, it's important to let the resin sit undisturbed. Moving or touching the resin during this time can disrupt the curing process and lead to issues such as incomplete curing or the formation of bubbles. Once the resin has fully cured, it can then be removed from the mold. This should be done carefully to avoid damaging the cured resin.
Bouquet Casting Co follows a meticulous curing process for their preserved bouquets. They understand that the curing process is a critical stage in the preservation process, so they take great care to ensure that the resin is allowed to cure undisturbed and at the right temperature. Once the resin has fully cured, they carefully remove the preserved bouquets from the mold, ensuring that the final product is flawless and ready to be enjoyed for years to come.

Mastering the proper mixing techniques for resin can open up a world of possibilities in the field of art and crafts. From creating stunning jewelry pieces to unique home decor items, and even preserving precious memories like wedding bouquets, the possibilities are endless.
By understanding the importance of resin mixing, using the right tools, and following the recommended techniques, you can create beautiful and durable resin creations.
Bouquet Casting Co, with their expertise in resin mixing and their commitment to quality, offers inspiring examples of what can be achieved with proper resin mixing techniques. Their stunning preserved bouquets and unique resin art products attest to their skills and dedication to their craft.


Comments